Do you know how to manage your boat battery bank? Do you know what your boat battery bank levels normally are at different points during the day? Are you confident that your monitors are giving you the right readings? Once you’re comfortable with the batteries you have on your boat, it’s critical to gauge normal daily performance, so you can quickly troubleshoot and identify problems.
This is part 2 of our 3-part series Marine Boat Batteries. Review Part 1, The Beginners Guide To Marine Boat Batteries, on understanding what type of batteries you have on board, and how to maintain them. In Part 3, How To Increase The Lifespan Of Your Batteries, we discuss ways to extend your batteries’ lifespan.
Watch the video and/or scroll down to read our more in-depth article all about how to manage your batteries.
How To Manage Your Boat Battery Bank Video
Without looking: Do you know your boat battery voltage levels first thing in the morning? What about midday, or at night?
Think of the house battery bank as the heart of your boat at anchor. When it isn’t performing properly, it’s a nightmare. If effects your lights, your fridge/freezer, your electronics – even your windlass.
If you don’t know the “normal” voltage levels of your boat batteries, how will you know when something’s amiss? Catching problems early helps you avoid more serious damage, and saves you big bucks in repairs.
You might need reminding to check your levels at first, but after a while, it will just become part of the routine as you fix a cup of coffee in the morning, or pass by your battery monitor display.
Make Sure You’re Seeing Accurate Voltage Readings
The first step in how to manage your boat battery bank is learning the normal levels of your boat battery system. You’ll want to make sure that you have a voltmeter (battery monitor) on board. Next, and equally as important, is to make sure the voltmeter is giving accurate readings. Oftentimes, owners place blind trust in their meters without considering if the readings are in line with what power they have coming in at the time, or what load is currently on the system.
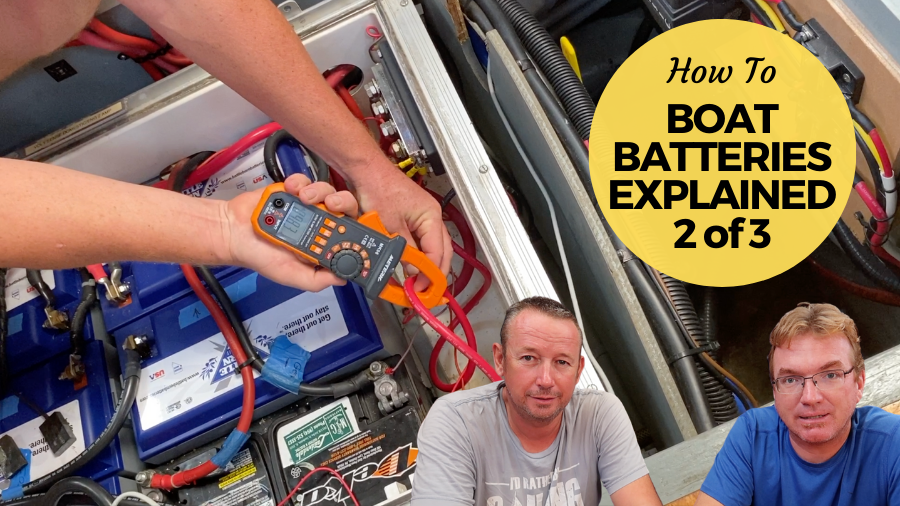
Most boats have a voltmeter installed at the navigation station. To make sure it is performing correctly, grab your multimeter (an essential tool to have onboard) and open up your battery bank. Adjust the tool to the DC voltage setting and check your voltage level right at the battery. If you have a 24-volt bank, be sure to measure across two 12-volt batteries.
Your battery monitor should also be measuring your voltage right at the battery, so these two tools should be showing about the same readings.
If the readings between the voltmeter and the multimeter are off by a tenth of a volt or more, the culprit is most likely corrosion, poor wiring, or the voltmeter is not measuring right at the battery terminals.

Ensure You’re Seeing Accurate Amperage and State of Charge Readings
Let’s learn more about how to manage your boat battery bank. Most battery monitors are not just voltmeters, they are also ammeters, measuring amps in, amps out, and percent state of charge of your boat battery bank. To ensure these readings are accurate, you need to program in:
- The type of batteries you have
- The size of your battery bank
In the previous video and writeup, The Ultimate Guide To Marine Boat Batteries, the importance of fully charging your battery bank was discussed. This is to maintain the bank’s health, but also to keep your ammeter accurate. The ‘brain’ in your charger is typically separate from the ‘brain’ in your ammeter, and they don’t talk to each other.
Your charger knows the bank’s state of charge by what it can accept (internal resistance), and that changes throughout the charging process. It manages this all by itself.
The ammeter only keeps track of amps in and out, similar to the person at the door of a venue with a clicker counter (why do they always seem grumpy?). When fully charged, think of the counter at zero. During discharge, we start going down and during charging, we go back toward zero. While doing frequent charge/discharge cycles without fully recharging, the counter loses track and becomes inaccurate.
During a full charge, the counter will go back to zero and typically go into positive numbers (+2, +5, etc). Once the charging stops and discharge begin, the counter should ‘reset’ its zero point. So it may be reading +8, but it then clears that and makes that its new zero point, effectively self-calibrating.
If your charging sources say your bank is fully charged and goes into float, but your ammeter still shows negative numbers you may need to do a manual ‘re-zero’, or there may be another issue to resolve.
Also, be sure to adjust the size of your battery bank on your monitor over time, as their amp-hour capacity depreciates. For instance, if you start with a 500-amp-hour battery bank, depending on maintenance and abuse it could be a 400-amp-hour bank a couple of years later. This reduction in capacity happens much slower on lithium banks than it does for lead-acid types (Flooded, AGM, and Gel). The loss can be estimated via the tests explained in the previous video.
Read the manual for your battery monitor to learn exactly how to input this information and calibrate your specific monitor. The process should be fairly straightforward.
If you see a sudden reduction of battery bank capacity, you may have one bad battery that’s pulling the whole bank down.
To confirm, disconnect your batteries and test them individually. After being disconnected for 10 minutes or so, one battery may show a much lower voltage than the others. That’s your culprit! During charging, that battery will often be warmer than the others also. Another benefit of doing this test is by isolating each battery, you’ll be taking the hardware apart allowing you to easily clean the connections apply a fresh, thin coat of dielectric grease to the terminals.

How to Manage your Boat Battery Bank by Keeping Your Boat Batteries Healthy and Happy
How do you keep your boat batteries happy? The short answer: It depends. Everyone has a different battery charging setup on their boat, and what works best and most efficiently is dependent on that setup.
The long answer: A boat may have many different charging sources, including a shore power charger, solar panels, wind generators, and gensets – either an inboard diesel genset or a portable unit. As a new boat owner, it’s critical to understand what charging mechanisms you have and if they are working properly.
Solar and wind are essentially “free” charging methods once they are installed, so maximize these sources. Ideally, you want to minimize shore power and genset charging, as these methods cost money in gallons of diesel and your electric bill at the shore pedestal.
Once you understand your charging sources, make sure they’re working correctly.
Let’s take a look at solar chargers, for example. Some have a meter built into the front for readings, and others have Bluetooth capability for you to monitor the solar output from your phone. In order to make sure the reading is accurate, use an amp clamp meter – another helpful tool to have on board. You can get one at most any hardware store, and it can also double as your multimeter.
Turn your tool on and adjust the setting to DC amps. Take the output (either the red or black wire) of the solar charger that’s going to the battery bank and clamp the tool around that wire. The reading from your meter should very closely match the reading on your solar charger. You can perform the same test for your other sources.
Identifying your charging sources and their performance is only the first step.
In order to determine the best charging setup for your particular boat, each owner needs to do their own homework. How power-hungry are you? Are you charging devices like laptops and tablets all day? Do you have a microwave or coffeemaker on board that you use daily? Do your fridge and freezer take a lot of power?
If you do require a fair amount of power, and you don’t have renewable sources of energy, like solar and/or wind, you may be looking at running your generator multiple times a day to keep up. Even with renewable energy sources, you need to have a strategy for non-optimal days, when it’s cloudy, or there’s no wind. You’ll likely be running the genny or the engine to make up the difference.
If you are a power-hungry boat, and your budget affords it, lithium-ion batteries may be key, as they take up less space as a bank, charge more efficiently, and can be more deeply discharged than lead-acid – to name a few benefits. Check out our Lithium Battery Install to see how and why we changed to Lithium.
Whatever you have, and however you charge it, make sure you have a strategy in place to keep your batteries happy. This is key to how to manage your boat battery bank.

Keep Boat Batteries Clean, Tight and Neat
A few more things about how to manage your boat battery bank. In addition to monitoring your charging systems and output, keep an eye out for a boat owner’s worst enemy – corrosion.
If you start to see that on your battery bank it must be dealt with. Turn off all your breakers and turn off your main battery switch. Make sure all DC devices are off, and then one at a time disconnect your batteries. Remove the corrosion with a wire brush, sandpaper, or a file, until the surfaces are shiny again. Once all surfaces are restored and cleaned, apply dielectric grease, which is a silicone grease used to prevent corrosion but still allow electrical conductivity. A thin coating is sufficient.
You also need to keep your battery cables tight. Whether from disconnecting the batteries for maintenance, or as a result of sailing in rough seas, the cables may have loosened. Tighten up your connection points using nuts with lock washers. If you have wing nuts on your bank, replace them.
Finally, keep your boat battery bank neat – don’t overload elements – so you can easily disassemble and/or troubleshoot if needed.
Here are a few tips:
- Use a properly sized bolt, a lock washer, and a nut.
- Don’t put a washer between the face of your battery lug and the battery cable in order to maximize the surface area of connection.
- If there are multiple wires on a post, put the largest lug on first, and then smaller and smaller elements, as you work out toward the nut.
- Never more than four wires on a post, per ABYC. As you add more wires, it becomes more difficult to keep things tight and harder to isolate and troubleshoot in the event of a problem.
FREE TOOL: GET YOUR ELECTRICAL SYSTEM AUDIT CHECKLIST
For a limited time, we’re offering a checklist to help you know what you need to know about your boat’s electrical systems, the basics of troubleshooting, and how to determine when it’s time to call in an expert. Get the Electrical System Audit here.
Are you in or going to Grenada?
Make sure to contact Aaron if you’re in Grenada.
Owner Aaron Downey grew up powerboating and began racing sailboats in the U.S. in 2000. He and his wife purchased their first cruising sailboat in 2012. After completing his USCG Master’s license in 2012 and ABYC exams in 2013, Aaron founded CMS as a side business at the repeated requests of fellow boat owners and yacht yards.
His many years designing large, complex land-based technology and electrical systems paired nicely with his experience on the water, creating a unique and robust skillset.
Since then, CMS has seen a long list of happy boat owners in its wake, throughout the U.S. and Caribbean. Let us assist you with your system design or problem-solving – no matter how big or small, simple or complex. From small sailboats to superyachts, simple circuits to large yacht refits, CMS has been there. Click the image below for more information on Aaron from Clarity Marine Systems.
Other articles of interest
- The Beginners Guide To Marine Boat Batteries – Part 1 of this 3 part series
- How to Increase the Lifespan of Your Batteries – Part 3 of this 3 part series
- Our Solar Power Installation
- Lithium Battery Upgrade
- Understanding Your Boat’s Electrical Systems
- How To Prevent Boat Fails
Any questions or comments on part one of our Marine Boat Batteries series?
Please leave them below.
Credits
The articles in this series are guest-written by Meg Downey.


7.28.2020
Hi all!
Nicely done battery tutorials!
Many people often purchase spare battery post clamps without any attention given to the bolt
metal which tightens the clamp to the battery post these always corrode making it quite a
chore to loosen the battery clamp for needed maintenance! I’ve found over the years that
exchanging those for: stainless steel bolts,nuts & lock washers along with the use of treated
battery post pads placed at the base of each battery post under each post clamp does
wonders for wining each battle against corrosion but not the war! Silicone base paste used
on copper wire strands & any related bolt threads to help prevent corrosion further provides
the icing on the cake! General corrosion is an electrical systems Gremlin that toys with
meter readings! Happy Gremlin Hunting! W.W.
There are different kinds of chargers used for different kinds of electrical devices or machines. chargers are used to power, recharge, or give energy to devices/machines. It depends on the charger you are using that will show how fast or slow your phone will be powered. If it a good and original charger It will charge very fasts. Thanks for this article.