As a boat owner, it’s imperative to first educate yourself on what type of marine boat batteries you have and what condition they’re in. Next, you’ll want to learn how to take care of your batteries so they last as long a possible. This is part one of a three-part video and article series all about marine boat batteries.
This is part 1 of a 3-part series on The Beginner’s Guide to Marine Boat Batteries. Part 2, How to Manage Your Boat Battery Bank, covers learning the normal levels for your bank and identifying the right charging strategy for your particular system. Finally, Part 3, How To Increase The Lifespan Of Your Batteries, we discuss ways to extend your batteries’ lifespan.
Watch the video and/or read the article below to ensure you’re not left powerless in the middle of the high seas!
As a boat owner, you know that you have a battery bank down below that serves as the heart of your systems. But have you spent much time with it? Do you know what type of batteries you have, and the proper way to maintain them? Do you know how to tell when your levels are off, and where to start looking for problems?
It might be time to familiarize yourself with your new best friend – your battery bank.
1. Identify Your Marine Boat Batteries
When you buy a new boat (or even before purchasing), one of the first things to identify is what type of batteries you have, how big the bank is, and how to maintain it.
Generally speaking, you will have a bank of main batteries, as well as a starter battery. Here are the most common types of batteries.
- Lead-acid
- AGM
- Gel
- Lithium (LiFePo4)
AGM and Gel are both versions of sealed lead-acid batteries.
For wet lead-acid batteries, you also need to check the water levels. Are they bone dry? Many new boat owners with a wet lead-acid bank often don’t know that the batteries need to be watered occasionally with distilled water, though other battery types are relatively maintenance-free.
When checking the water levels, remember that you’re dealing with sulfuric acid, so wear proper eye protection in case of splashes upon unsealing. Once they’re open, the water should be covering the plates, which look a bit like radiator fins, and no higher than the end of the plastic tabs that extend down from the top of the battery.
If the water level is up to the tabs, the battery is full. And remember – always fill with distilled water, which is sometimes called battery water at marine chandleries.
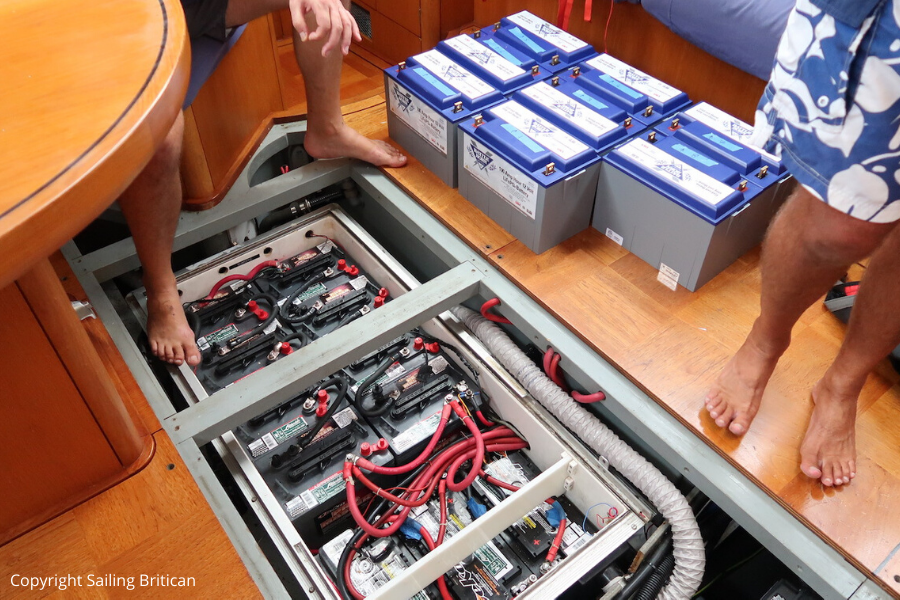
2. Check the Physical Condition of Your Bank
After identifying what type of marine boat batteries you have, you should check their visual condition. Look at the battery cases – are the sides bulging out or disfigured in any way? Are there cracks in any of the plastic casings? Is there a lot of debris and moisture on or around the bank?
If you have wet lead-acid batteries and they are bone dry, this doesn’t necessarily mean that they’re ruined. It does mean that they’ve been abused, and likely their life expectancy and capacity is reduced. Fill them up, cap them, charge them, and monitor them.
Corrosion on the battery terminals can also cause performance problems, but it is usually easy to clean up. There’s a wealth of information online regarding how corrosion presents and how to treat it.
Visual damage, low water levels, corrosion – these are all signs that the previous owner has not been properly maintaining the batteries.
Your batteries can last anywhere from two to eight years. That’s a huge range and for good reason! It all depends on how well they are maintained.
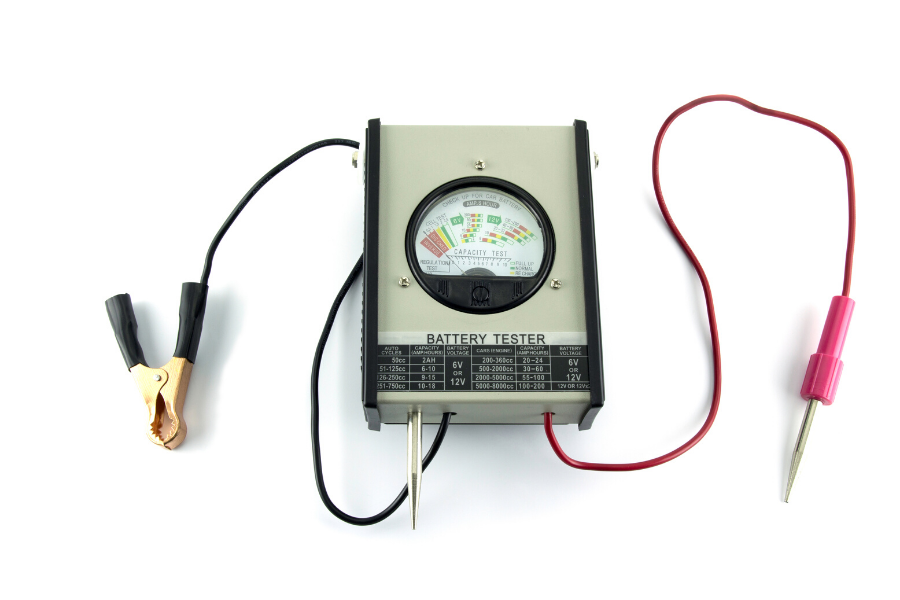
3. Check Your Marine Boat Battery Health
Once you’ve assessed the condition of your batteries, it’s important to check their performance.
For all lead-acid marine boat batteries, including wet lead-acid, AGM, or gel, there are several ways to test them. You can do a load test with devices on your boat, use a load tester device, or a digital battery tester. While a load test is the most accurate method for determining amp-hour capacity, a battery tester, also called a digital conductance tester, can quite accurately tell you the batteries state of health (as compared to when they were new) if properly used. If you’re around a group of boats and you don’t have one, ask around. Otherwise, a nearby marine electrician should have one.
1. Fully charge the batteries
Make sure the battery bank is fully charged before testing – which may require kicking on the generator or plugging into shore power if your solar power doesn’t quite get you to 100%. Once your batteries are done charging and your system has gone into float, put on your typical house loads for up to 15 minutes – fridge, freezer, etc. This will remove the surface charge on the batteries and get them down to a resting voltage.
2. Shut the system down
Next, shut everything off. All of your systems, your DC panel boards, and your batteries – this is to make sure you’re accurately testing them, rather than the charge under load.
When checking or troubleshooting your batteries, there’s no need to be scared – as long as you’re not touching black and red at the same time, you’re fine. Remove any jewelry or metal you may be wearing – rings, watches, necklaces – to make sure you don’t accidentally complete the circuit. In addition, if you’re using metal tools, keep a good grip, and make sure you place them out of the way when not in use.
3. Disconnect the batteries
When you’re ready, open up your battery bank. Then disconnect the cables, or take the leads off of the batteries. This is so that they are no longer connected together or to anything else. Doing so will allow you to determine if one of your batteries may be bringing your whole bank down. Or it will show if you still have an unknown load on your bank. Use a socket wrench to disconnect the leads easily and safely, and keep a good hold on your cables as you’re loosening them.
4. Test the marine boat batteries
You’re now ready to test each battery individually with your conductance or load tester. When the tool is turned on, touch the red connector to red and the black connector to black; check your reading.
If you don’t have a load or conductance tester handy, but you still want to see if you have a failing battery in the bank, you can use a multimeter. Fully charge your batteries the same way as described and isolate each battery. Switch the multimeter to DC voltage, touch red to red and black to black, and note the reading. You can compare voltages between batteries, and all should read very similarly.
Regarding charge percentage, in general, about 12.7 volts is fully charged. 12.4 is 75%, and 12.2 is about 50%. With any type of lead-acid battery, you shouldn’t be discharging below 50-60%.
So remember: Charge, Isolate, Eliminate Variables, and Test.
4. Secure Your Battery Bank
A critical component in prolonging the life of your battery bank is making sure they are properly enclosed and secured. Housing them in a water-resistant enclosure is key. For wet lead-acid batteries, for instance, if one cracks or leaks, the electrolyte is contained – pretty critical when the alternative could be sulfuric acid running through your bilges. Also, should fresh or saltwater penetrate the area your bank is located, the batteries could short circuit.
Strapping your marine boat batteries down is also crucial.
According to the American Boat and Yacht Council, the general rule of thumb is to make sure that there’s not more than an inch of movement in any direction. This can be achieved with battery straps, which are sold at most marine chandleries or automotive stores.
When you’re out in rough seas, or when a monohull is heeled over under sail, you want to make sure your batteries stay in place.
As a new boat owner, identifying what marine boat batteries you have and assessing their condition and performance is a terrific starting point for the next part of the process: troubleshooting problems.
FREE TOOL: GET YOUR ELECTRICAL SYSTEM AUDIT CHECKLIST
For a limited time, we’re offering a checklist to help you know what you need to know about your boat’s electrical systems, the basics of troubleshooting, and how to determine when it’s time to call in an expert. Get the Electrical System Audit here.
Are you in or going to Grenada?
Make sure to contact Aaron if you’re in Grenada.
Owner Aaron Downey grew up powerboating and began racing sailboats in the U.S. in 2000. He and his wife purchased their first cruising sailboat in 2012. After completing his USCG Master’s license in 2012 and ABYC exams in 2013, Aaron founded CMS as a side business at the repeated requests of fellow boat owners and yacht yards.
His many years designing large, complex land-based technology and electrical systems paired nicely with his experience on the water, creating a unique and robust skillset.
Since then, CMS has seen a long list of happy boat owners in its wake, throughout the U.S. and Caribbean. Let us assist you with your system design or problem-solving – no matter how big or small, simple or complex. From small sailboats to superyachts, simple circuits to large yacht refits, CMS has been there. Click the image below for more information on Aaron from Clarity Marine Systems.
Other articles of interest
- How To Manage Your Boat Battery Bank Part 2 of this 3 part series
- How to Increase the Lifespan of Your Batteries – Part 3 of this 3 part series
- Our Solar Power Installation
- Lithium Battery Upgrade
- Understanding Your Boat’s Electrical Systems
- How To Prevent Boat Fails
Any questions or comments on part one of our Marine Boat Batteries series?
Please leave them below.
Credits
The articles in this series are guest-written by Meg Downey.
Great subject! This very informative video series will help demystify a boats electrical system.