• Skip to primary navigation
  • Skip to main content
  • Skip to primary sidebar
  • Skip to footer
  • Home
  • My Account
  • Cart
  • Contact Us
    • Shipping Policy
    • Refunds and Returns
    • Terms & conditions

Sailing Britican

Learn to Sail with Confidence

TwitterYoutubeFacebookLinkedinPinterestInstagram
  • Home
  • Get Sailing Experience
  • Delivery Assistance
  • Sailing Books
  • Sailing How To’s
    • Buying A Boat
    • Checklists
    • CopperCoat
    • Destinations
      • Atlantic Crossing
      • Bahamas
      • Bermuda
      • Caribbean
      • Florida
      • Mediterranean
    • Electrical Systems
    • Getting Started
    • Safety
    • Kids On A Boat
    • Life Aboard
    • Maintenance
    • Major Upgrades
    • Making An Income
    • Marina Life
    • Our Journey
    • Organization & Cleaning
    • Passage Planning
    • Sailing Gear
    • Sailing, Maneuvering, & Mooring
    • VHF
  • Sailing Gear

How to make your own port screens and save 100’s of dollars!

May 16, 2017 7 Comments

Share
Pin2K
Tweet8
WhatsApp
Print
Email
2K Shares

Learning how to make port screens for your boat port windows isn’t difficult. Keeping mosquitoes outside is a necessity for sailing cruisers. After getting bitten alive, I decided to come up with a way to keep the little buggers out.

The first line of defense for boaters wanting to avoid bug bites is to ensure that the boat has screens. This article offers step-by-step instructions in written and video format.

Learn how to save over $85 by making your port screens!

On Britican, we have professionally made screens for some of our port windows but not all of them. Our professionally made port screens cost around $85 a pop. At West Marine, a standard Portlight Clip Flyscreen costs $60 each! Fed up with watching our savings drain down, I decided to find an alternative solution—a Do-It-Yourself (DIY) option.
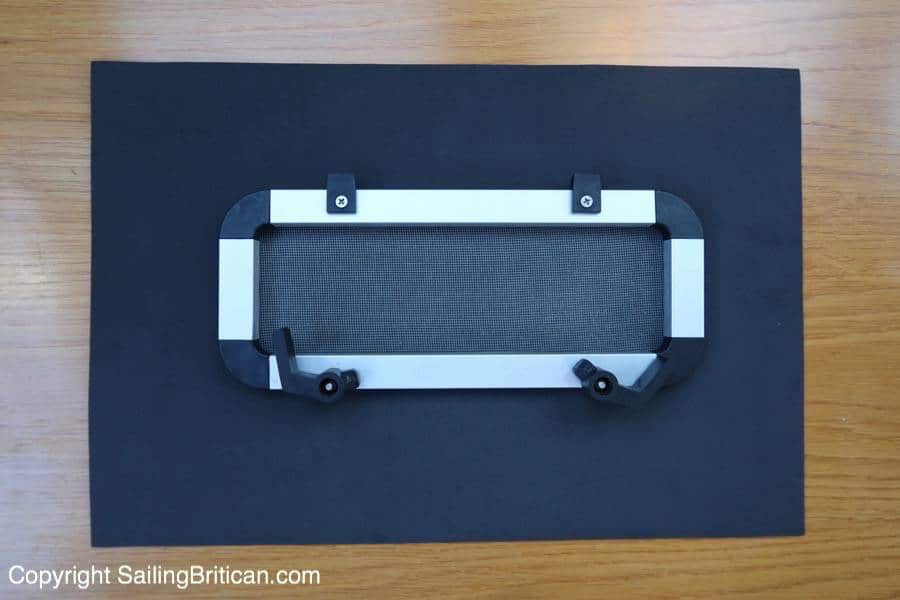
Make Port Window Screens

Each DIY port screen came out to around $2.00!

Watch the video. Below is the list of products used, step-by-step instructions, and some helpful tips not included in the video.

How to make port window screens VIDEO

DIY port window screen materials

Note that the links open on a new screen and are the exact products I used to make the port window screens.

  • Paper towel or paper (to make a template)
  • Scissors
  • Ruler
  • Sharpie or marker
  • Glue (I used a glue that had a permanent bond, was washer-dryer safe, in case they got wet, and was flexible). See below for link.
  • Screen. See below for link.
  • Foam sheets. See below for link.

Materials I used from Amazon

Sale
E6000 230010 Craft Adhesive, 3.7 Fluid Ounces
Dries clear, paintable; Photo safe; Temperature resistant; Non-flammable once cured; Safe for photographs
$8.95 Amazon Prime
Saint-Gobain ADFORS Standard Screen, 48 Inches x 84 Inches Roll - Replacement Screen for Windows and Doors - Charcoal
Saint-Gobain ADFORS Standard Screen, 48 Inches x 84 Inches Roll – Replacement Screen for Windows and Doors – Charcoal
48 inch x 84 inch; Perfect for use in windows and doors; Will not dent, crease, or unravel
$15.34
FOAMIES FOAM SHEETS 12' X18' - BLACK (SET OF 10 SHEETS)
FOAMIES FOAM SHEETS 12″ X18″ – BLACK (SET OF 10 SHEETS)
SHEETS ARE 2MM THICK; PERFECT FOR ANY PROJECT; SET OF 10 SHEETS
$25.99

Step 1: Make a port screen template

Use either a paper towel or a paper thin enough to see through. I used a paper towel because a single sheet of paper isn’t large enough. With a paper towel, I taped the towel to the widow and folded it to size, and where I couldn’t fold it (around curved corners), I used a marker to sketch the curve.

Once the paper towel is ready, take it down and cut out any pieces to make the master template for the port screens.

Check that the template works. You’ll want to ensure the template is larger than the screen area.

The aim is for the finished screen to fit between the port window frame. There’s a gap, and we want the screen to squeeze into it, allowing it to stay in place.

Trim the template to get as close as possible. Make sure to make the template too big for the port screens rather than too small!
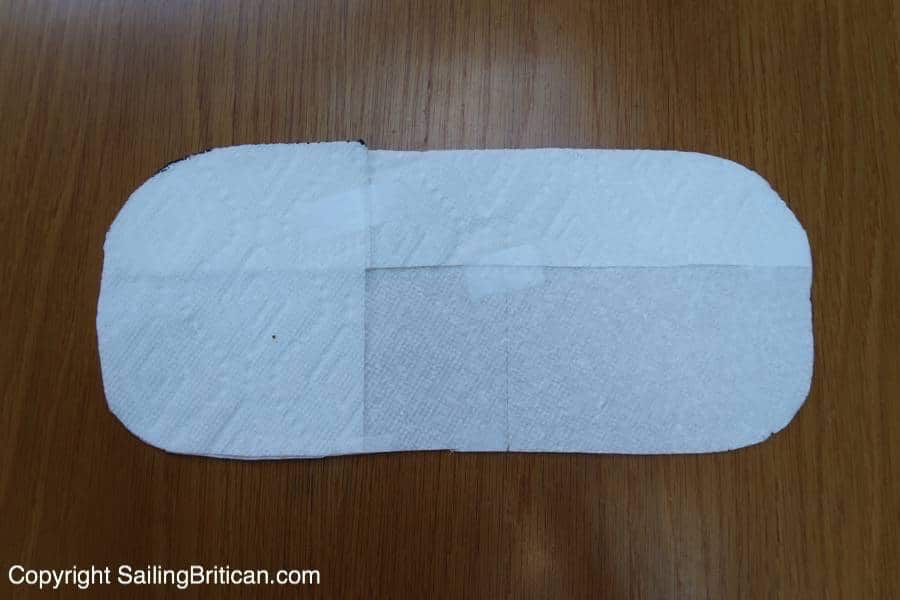
Make Port Window Screen

Step 2: Use the template for the port screens to cut out the first foam piece.

Once the foam piece is cut out, check it fits into the window. Trim the foam until you get a good, snug fit.
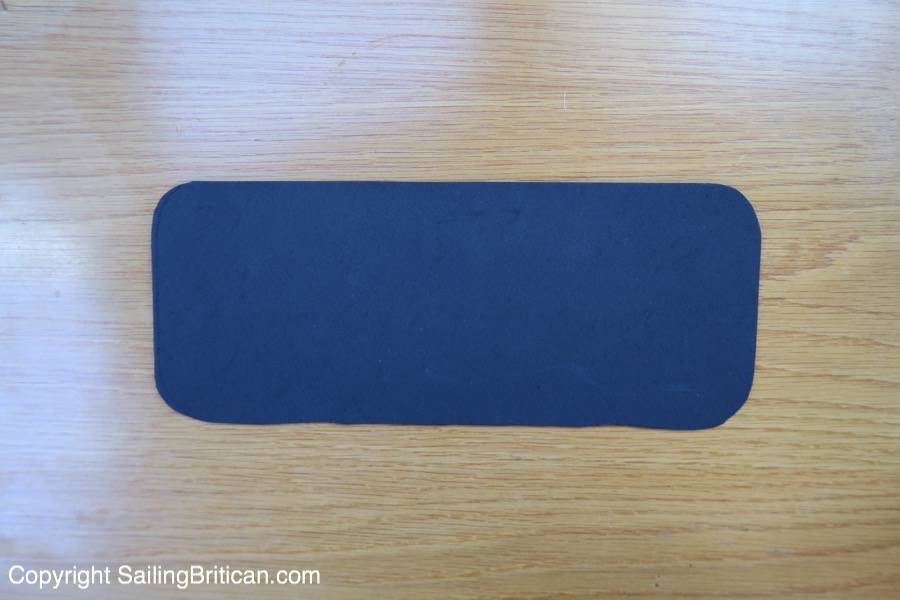
Make Port Window Screens

Step 3: Use the first foam piece to outline and cut a second foam piece.

Tip: Make sure to keep the foam pieces in line. You might want to put a TL for ‘top left’ on both. If they flip over, the pieces might not fit perfectly.

Step 4: Cut out the middle section on the first foam piece for your port screen.

Using a rule, make dots ½” from the edge towards the body of the foam piece all the way around. Connect the dots with a ruler to ensure a nice smooth line.

Cut the middle section out.
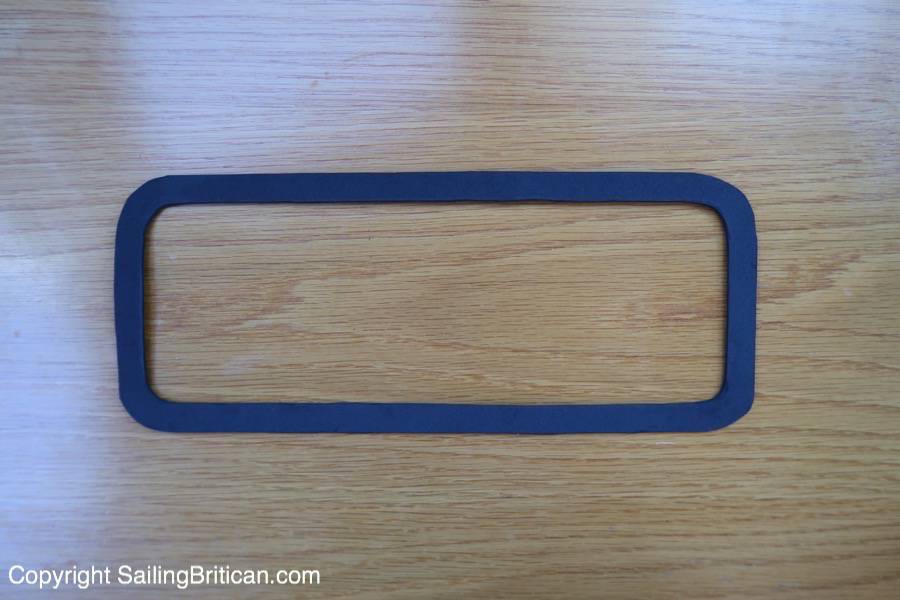
Make Port Window Screens

Step 5: Use the first foam piece as a template for the second foam piece

Draw a line using the first foam piece as a template. Take your time on this – the foam will move around. You want both foam pieces to match as best as possible. Cut out the second foam piece.

Step 6: Cut out a piece of screen

Tip: I suggest you cut out a piece of screen larger than the foam pieces. When I first tried making a screen, I cut it using the template. When I laid the screen on the glue it didn’t match correctly, I couldn’t move it easily and I managed to get glue all over the port screen!
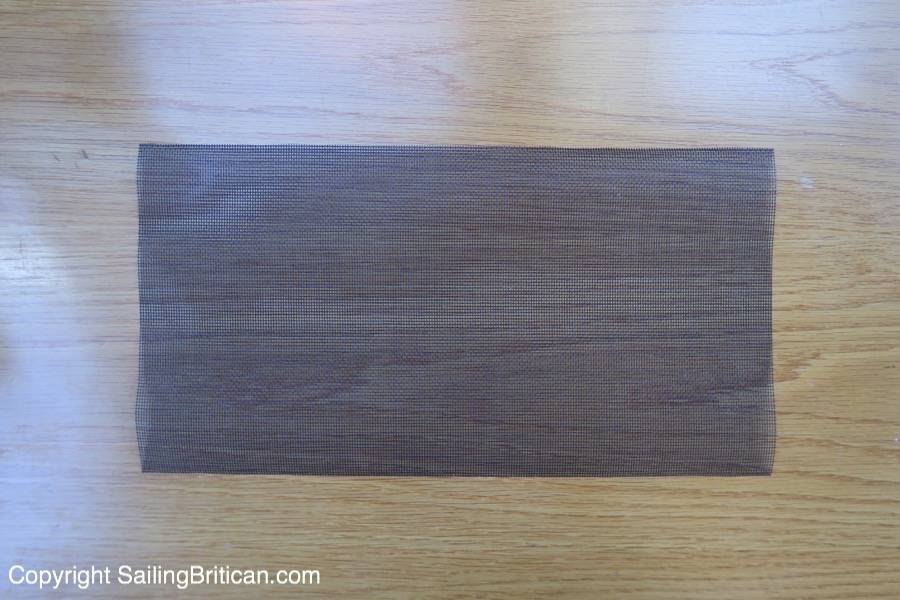
Make Port Window Screens

Step 7: Glue both foam pieces to the screen

Before gluing, make sure everything lines up. Glue the bottom foam, place the screen on top, glue the top foam, and make a sandwich.

Place a heavy book over the screen and allow it to dry. Once dry, cut the excess screen away and discard it.

Step 8: Fit screen to port window

Once the screen is dry, fit it into the window. If it doesn’t fit well and bubbles towards you, you might need to strip the sides down. Cut tiny pieces away until the screen fits snuggly.
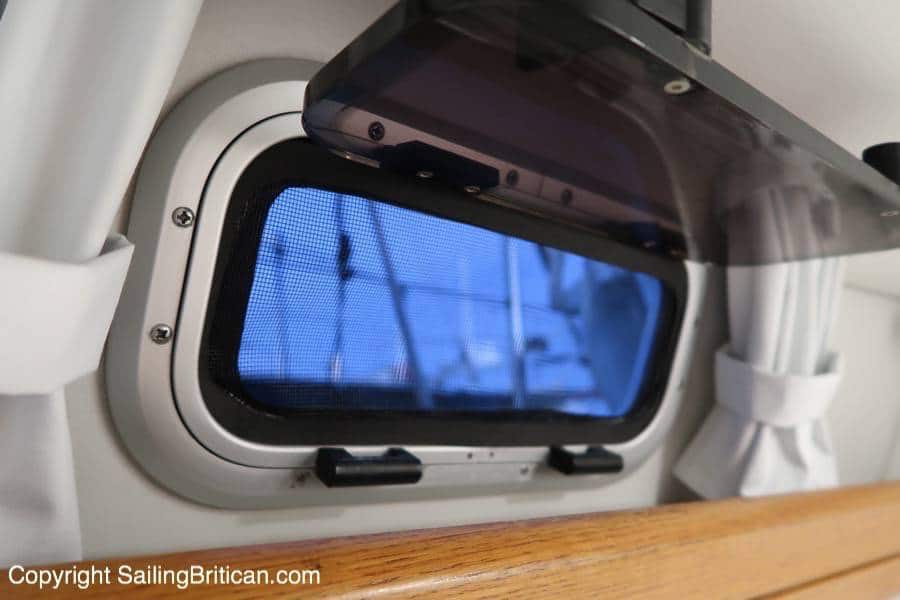
Make Port Window Screens

If you have any questions, comments or suggestions about port screens, please leave a comment below 🙂

Other Articles & Videos of Interest?

  • 7 Boat Safety Mistakes and How to Correct Them
  • How to Increase the Lifespan of Your Batteries
  • How To Find A Boat Buddy
  • Provision and Prepare your Boat for Passage – Video

Other Resources

Share
Pin2K
Tweet8
WhatsApp
Print
Email
2K Shares

Tags: DIY, how to, Port Window, Screens Categories: Videos, Maintenance

Reader Interactions

Comments

  1. Pauline Jackson says

    May 16, 2017 at 4:50 pm

    Does this method work or the coach roof opening ports in the heads? Our bunk room has screens/ blinds fitted but these do not work in the heads due to the shower rail.
    Brilliant idea for the ports we have without screens.

    Reply
    • Simon Brown says

      May 16, 2017 at 5:47 pm

      Not sure how they’ll work outside of the port windows Pauline. The materials are so inexpensive it’s worth giving it a go 🙂

      Reply
  2. Ken says

    May 16, 2017 at 7:28 pm

    That’s a very good idea. I wish I’d known before I purchased ours three years ago from the manufacturer.

    Reply
    • Simon Brown says

      May 16, 2017 at 7:46 pm

      Well Ken – if you ever lose one you now know what to do 🙂

      Reply
  3. Ron says

    October 16, 2017 at 10:37 am

    Pretty neat idea, thanks

    Reply
  4. Michael says

    July 9, 2021 at 12:12 pm

    Can you actually close the portlight with these in place?

    Reply
    • Kim Brown says

      July 14, 2021 at 1:51 pm

      No, Michael, you cannot on our boat. Smiles, Kim

      Reply

Leave a Comment Cancel

Disclosure: We only recommend products that we use ourselves and all opinions expressed are our own. This post may contain affiliate links that at no additional cost to you, we may earn a small commission.

sidebar

Blog Sidebar

Get Sailing Experience

https://www.youtube.com/watch?v=oCH_OO7F0tE

Book Your Sailing Experience

Click here for: Full details, pricing, and application form here.

Must-Have Guides

Checklists For Sailors

VHF Radio Checklists For Sailors

Sailboat Buying Guide For Cruisers

A Sailing Cruiser's Guide To Making Money

Britican Experience

Sailboat Liveaboard Sailing Experiences

Free Guides

50 Suggested Checklists

Becoming a sailing cruiser

10 Steps To Buying A Sailboat

Electrical System Audit

Boat Safety Checklist

This Might Be Of Interest…

Recent Posts

  • Sailing the Bahamas – US East Coast to the Bahamas: 22 Action Steps February 25, 2025
  • Anchor and Rode Checklist – #1 Best Sailor’s Guide to a Good Night’s Sleep February 11, 2025
  • Sailing Away with Your Family: 1 Easy Step to Getting Started February 1, 2025
  • Why a Dedicated Boat Knife Is A #1 Must Have August 5, 2024
  • Boat Cruising: Your Guide to Smooth Sailing and Endless Adventures July 29, 2024

Nautical Gift Store

Footer

Contact Sailing Britican

We help people find adventure and freedom by becoming sailing cruisers. If you would like to get in touch or having any questions, call or email us!
WhatsApp: +1 910 403 3067 Email: info@SailingBritican.com

Sailing Guides Payment Info

We accept PayPal and all major credit cards including Visa, Mastercard, American Express, Discover, JCB Diners Club, credit and debit cards. Transactions are performed via a SSL server to ensure your safety.

Credit-Cards

Sailing On Social Media

TwitterYoutubeFacebookLinkedinPinterestInstagram

Statements

  • Cookie Policy
  • Privacy Statement
  • Refund and Returns Policy

Site Developed by Gary Fox

Sailing Britican, All Rights Reserved

Manage Cookie Consent
We use cookies to optimize our website and our service.
Functional Always active
The technical storage or access is strictly necessary for the legitimate purpose of enabling the use of a specific service explicitly requested by the subscriber or user, or for the sole purpose of carrying out the transmission of a communication over an electronic communications network.
Preferences
The technical storage or access is necessary for the legitimate purpose of storing preferences that are not requested by the subscriber or user.
Statistics
The technical storage or access that is used exclusively for statistical purposes. The technical storage or access that is used exclusively for anonymous statistical purposes. Without a subpoena, voluntary compliance on the part of your Internet Service Provider, or additional records from a third party, information stored or retrieved for this purpose alone cannot usually be used to identify you.
Marketing
The technical storage or access is required to create user profiles to send advertising, or to track the user on a website or across several websites for similar marketing purposes.
Manage options Manage services Manage {vendor_count} vendors Read more about these purposes
Preferences
{title} {title} {title}