In this post, I’ll show you what needs to be repaired on a teak deck, the tools and supplies necessary to repair it, the step-by-step teak deck repair process, and I’ll also offer some tips and tell you about what does and doesn’t work. Read the steps and then watch the video at the end for a full demonstration.

Teak Deck Repair – An Easy-To-Follow 10 Step Process
Step 1: Check the weather
You don’t want to be doing a teak deck repair if it’s raining.
Step 2: Get your tools and supplies ready
The tools and supplies that you want to have on hand before you start your teak deck repair are listed below. I’ve provided a link to either a distributor or Amazon. Make sure to shop around – these links are just here for you to get an idea on the actual products/tools (or similar) to what we use.
A caulk removal device
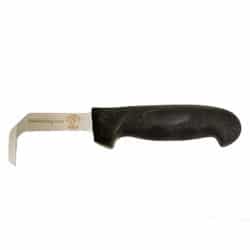
After looking around on the Internet we found this handy device at a distributor company for TeakDeckingSystems.
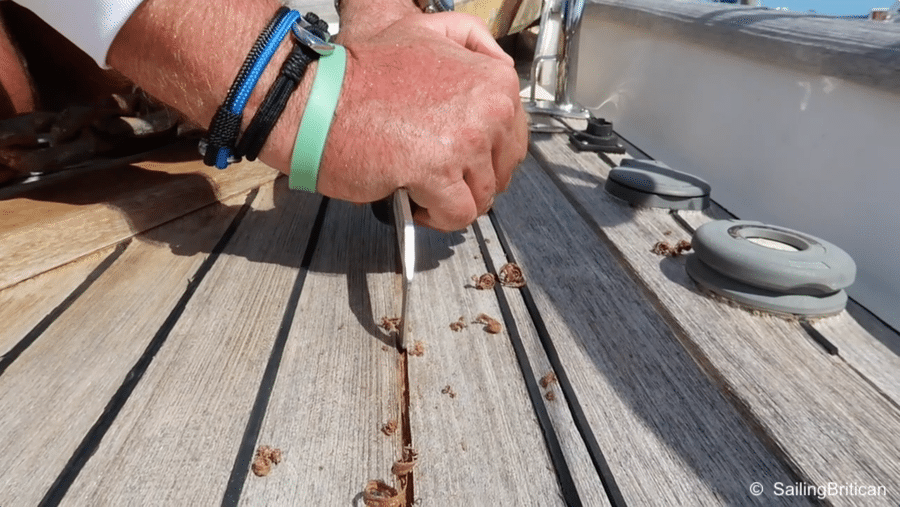
Having this tool for teak deck caulk removal is imperative. The tool will allow you to easily remove the black caulk and any wood below creating a nice clean space for the new caulk to be inserted.
You must have this! Teakdecking System Caulk Removal Tool.
A hand-held vacuum cleaner
A Dremmel
Blue tape
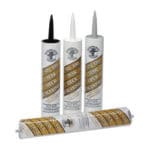
Teak Deck Caulking from Teakdecking Systems

There are other caulks and systems out there but this is the one that has worked the best for us. Unlike others, there’s no need to put primer down before caulking. Furthermore, this caulk seems to harden and set quickly. When using Sikaflex we’ve had mixed results. Sometimes it worked fine and other times it didn’t set leaving us with a mess. Like everything, you have to give various products a go and see what works best for you and your boat. More here: Teak Deck Caulking.
Leatherman or sharp knife
A skewer with a sharp end
Look in your kitchen drawer for one of these. And if you don’t have one, you can take apart a wire hanger and use that as a poking device.
Caulking gun
Puddy Knife
Sander
Paper towels, plastic bag, and box cutting knives
These are all normal household items that you can find easily 🙂
Step 3: Start digging your caulking out
Keep a vacuum nearby as there’s loads of caulk and wood dust that will be coming out of the groove. You don’t want this to go into the water – our oceans have enough crap in them! Furthermore, the dust and clippings will enter any window or hatch that’s open on the boat.
Step 4: Put the blue tape around the groove so that the teak is protected from the caulk
Take your time with this. Make sure you cover any teak. If you do, however, get caulk on the deck it can later be sanded off.
Step 5: Prepare the caulk
Cut the tube exit with a sharp knife at a 45-degree angle. Then puncture the inner tube before putting it into a gun. Once the caulk is in the gun pressurize the contents.
Step 6: Caulk the groove
At a 45 degree angle slowly squeeze the caulk into the groove ensuring that all the space is filled. Slowly move back ensuring that you’re not stepping in other areas of caulking. Once the caulk is in place, use a putty knife to slowly flatten the caulk into the groove.
During this step, it’s important to have a strategy if you’re going to do multiple lines. It’s so easy to accidentally step on the caulk and create a mess so be careful.
Step 7: Wait 40 minutes for the caulk to set
If you wait too much longer the caulk gets too hard and the tape becomes difficult to get off. If don’t wait long enough the caulk is stringy and blippy – it comes up with the tape and makes a mess.
Step 8: Remove the tape
This step needs to be done carefully. Don’t just pull the tape up and crumple it. You want to slowly roll it into a ball to restrict the amount of caulk that gets on your hands.
Step 9: Let the teak deck caulk dry overnight
As a side tip, if you have other people on the boat it’s worth taking some blue tape or a line to close off the area of the boat that has new caulk. By doing so you’ll reduce the likelihood that someone walks over it.
Step 10: Sand it down
When sanding it down if you notice that the caulk is higher than the teak, take a box cutting knife, bend it slightly and then skim the caulk down.
If you like checklists, make sure to get our Checklists For Sailors guide. You can buy it in our store here or on Amazon.
Teak Deck Repair Video
Any questions, thoughts or more helpful tips you can add to this post?
Please leave them below.
Get Simon’s Tshirt
 Are you a ‘Boat Hair Don’t Care’ kind of guy? If so, get your own t-shirt at our Etsy shop.
This t-shirt was designed by Britican and is exclusive to our t-shirt collection.
Check out our color and size options and if there’s something you want that you don’t see, send us an email and we’ll see what we can do.
Visit Etsy.com/SailingBritican
Other Articles Of Interest
- Teak Deck Maintenance Using Boracol
- Teak Wonder (A product to help make your teak look great)


Hi Simon,
I thought you should put a thin tape in the bottom of the groove of the line so the caulking only adheres to the sides of the groove and not the bottom.
Great videos as usual.
Regards
Denis
what is the purpose of the tape? why wouldn’t you want it to adhere to all 3 sides?
The purpose of the tape is to ensure that the TDS caulk doesn’t get on the wood and make a mess. 🙂
I think I’ll have to to some meters off this pretty soon.
Start as early as possible, is my advice.
Thanks for the trouble you had taken on your head, and made this blog so knowledgeable about TEAK DECK REPAIR It’s helping many people.
Do you have an estimate on how much caulk is needed? Either approximately how many feet of seam per tube or a guestimate on how much needed for recaulking a 50 ft sailboat. I need to buy it all in advance and ship it here to the Philippines so don’t want to run out mid job and wait two months for more.
We calculate based on 30′ per tube but there might be a different depth between our groove and yours. Perhaps you can contact the manufacturer and they’ll be able to give you a better guideline to work with? Kim